


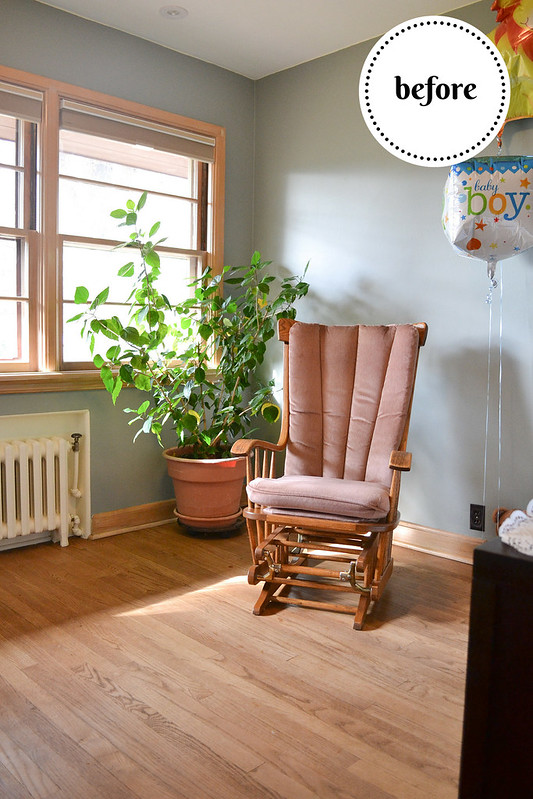
A month or so ago, we bought a glider off Craigslist for $75.
I knew that reupholstering it would be the a little bit trickier than my normal sew-all-straight-lines projects, so I’ve been putting it off. But, after spending about 6 hours on it, I can proudly say this was my best upholstery work to date.
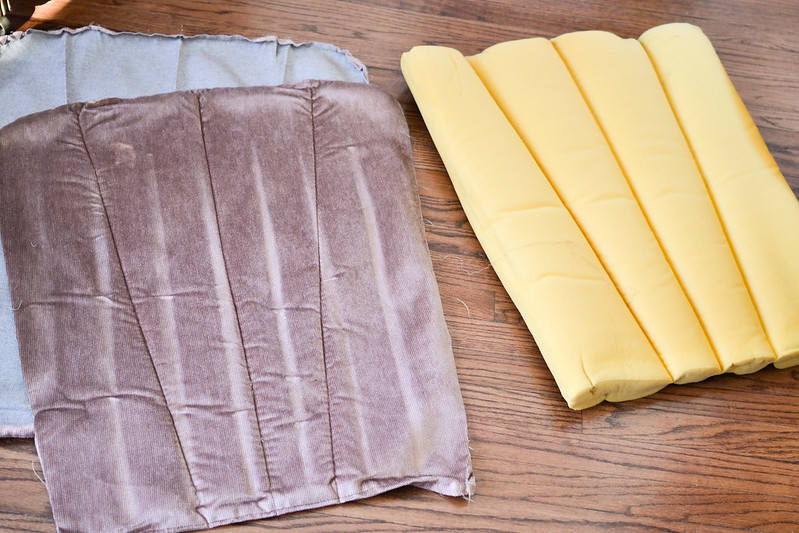
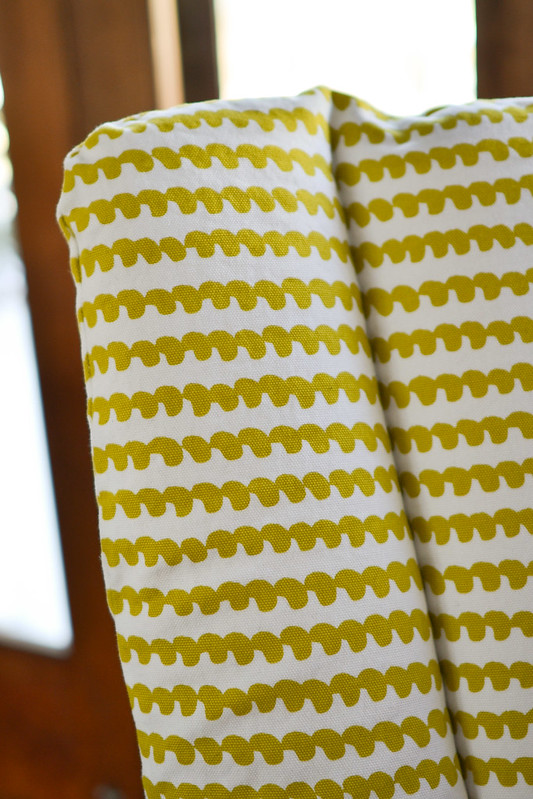
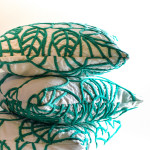
As always, I purchased the fabric from The Sewcial Lounge, which recently moved to a new location on Lakeside St. If you visit them, please also check out the Asian Sweet Bakery next door, because it is delicious. But I’m getting off topic. Here’s what we started out with:
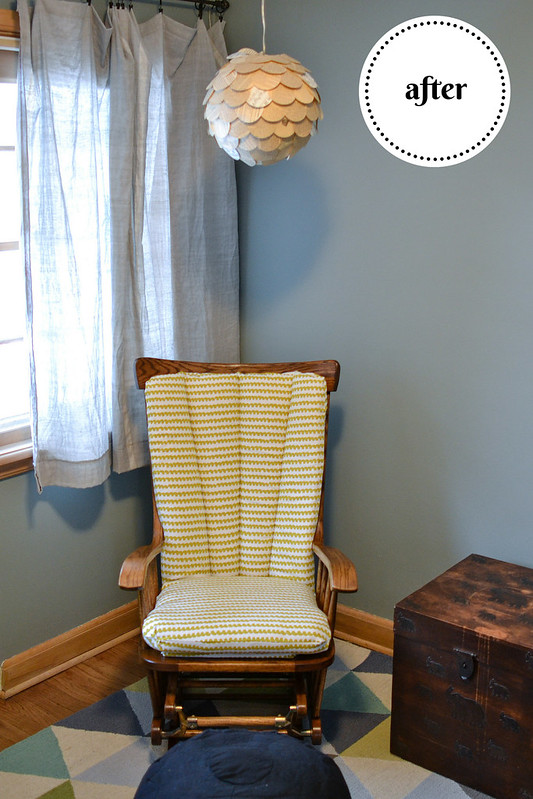
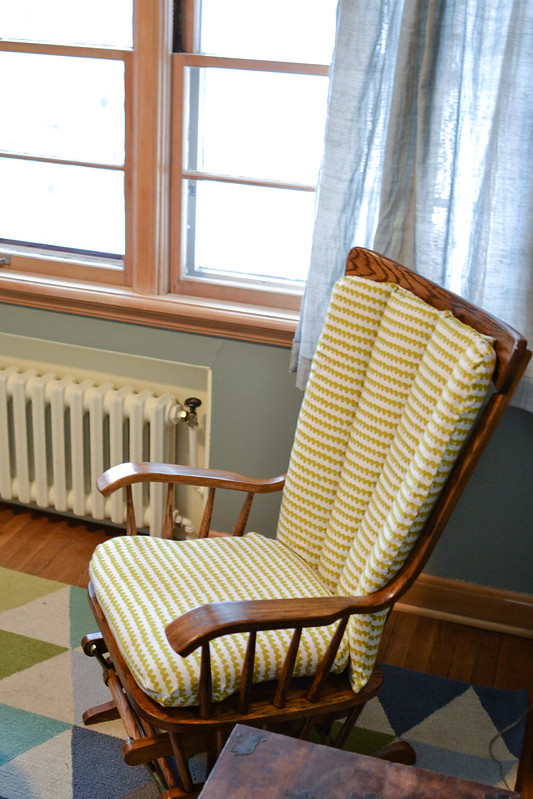
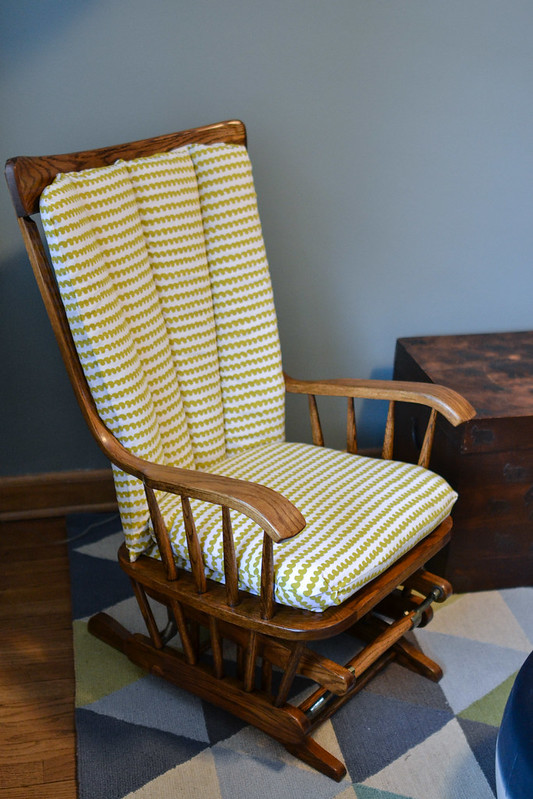
And here’s the end product:
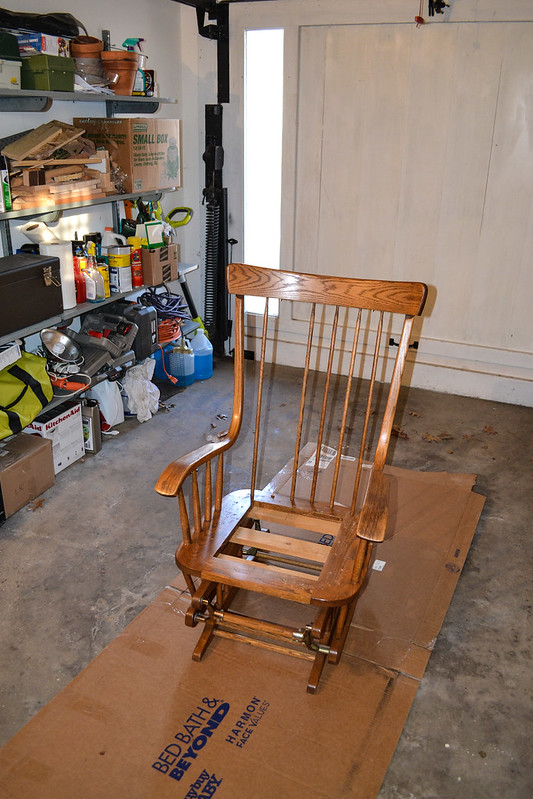
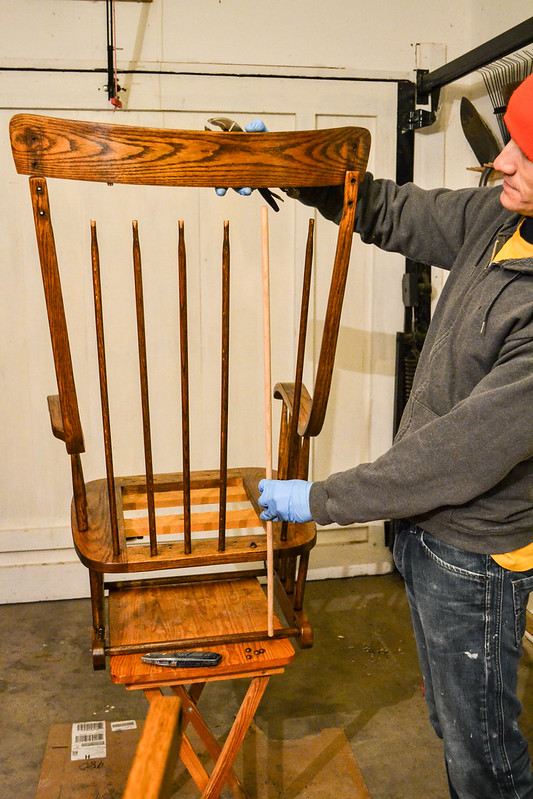
So how did we get this far? I’ll walk you through the reupholstery process. But before we get to that, let’s talk about all the work that Jason did. Unfortunately, when we bought the piece, we didn’t notice that one of the spindles in the back was missing, so in addition to refinishing the wood to a darker stain, he also had to whittle down a piece of wood and install it in the back of the chair.
I won’t even pretend to know how he did it, but it looks flawless.
Once the new stain dried, I moved onto the upholstery:
Materials
In order to reupholster a chair like this, here’s what you’ll need:
- Sewing machine
- Nylon thread
- Upholstery thread
- Long, straight upholstery needle
- Scissors
- Seam ripper
- Iron and ironing board
- Pins
- and, of course, a canvas-weight fabric of your choice
Step 1: Back Cushion
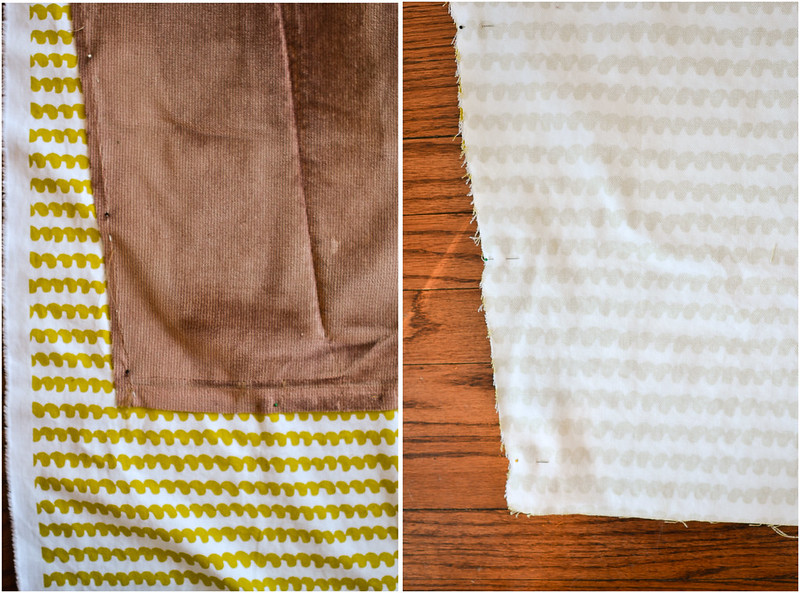
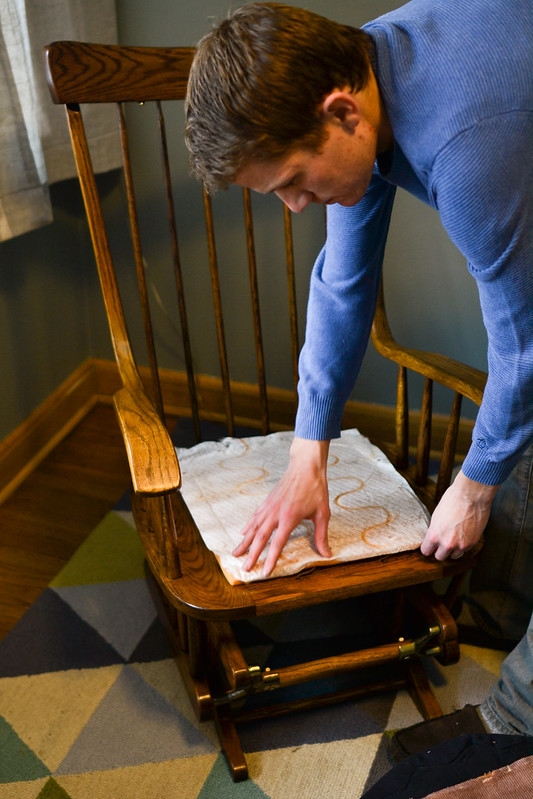
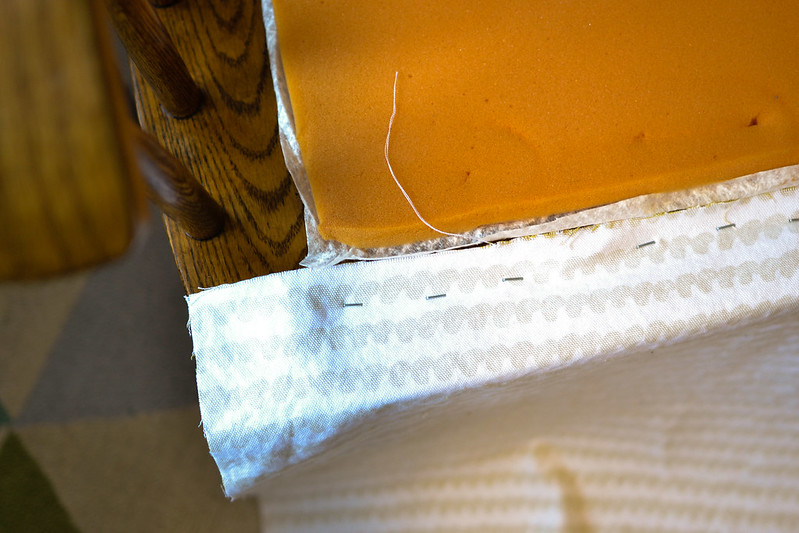
The nice thing about reupholstering a glider is that you can take apart the existing fabric and use it as a pattern for your new one. I started with the back piece of the chair and carefully separated it from the foam using a seam ripper. I ironed the old pieces flat, noting the seam allowance along the edges.
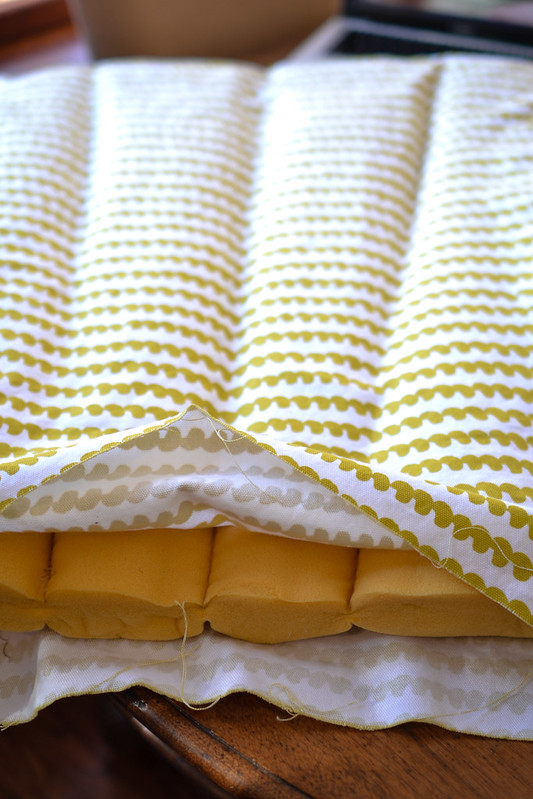
Next, I laid the two pieces of old fabric face up on the new fabric, pinned it, and cut exact replicas. I then pinned the two new pieces of fabric right-side in on three sides, leaving the bottom open so I could stuff the cushion back in.
I sewed around the edges using the same seam allowance as the original piece of fabric. Next, I flipped the fabric right side out and put the cushion back in.
Next came the fun part: hand stitching the creases into the fabric to recreate that nice tufted look. The good news is that the cushion was already shaped with the creases so I had a perfect guide, but it was a little tricky to get even stitches through the thick foam. This is where your upholstery needle and upholstery thread come in. I started with the bottom of the middle line and worked my way to the top.
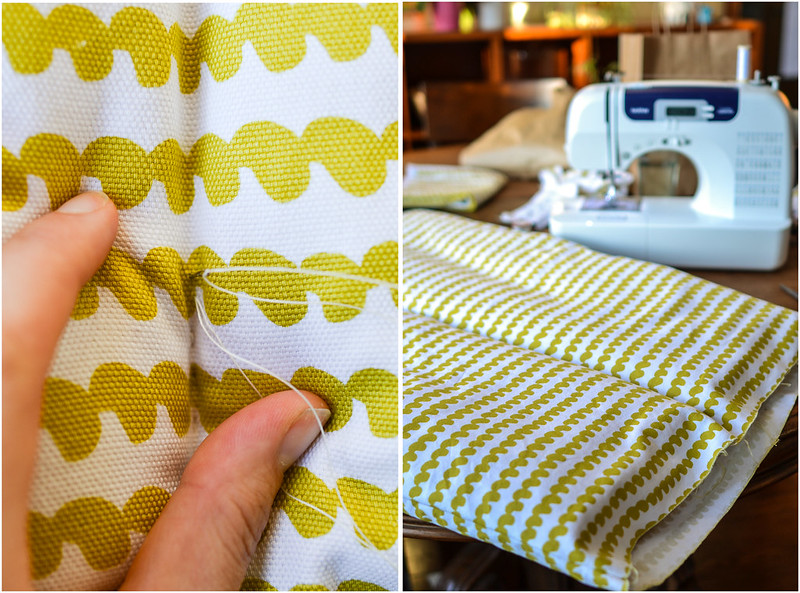
Then, I did the other two lines.
Once the lines were sewn in, I used the machine to close the bottom of the piece in. And the back piece was done.
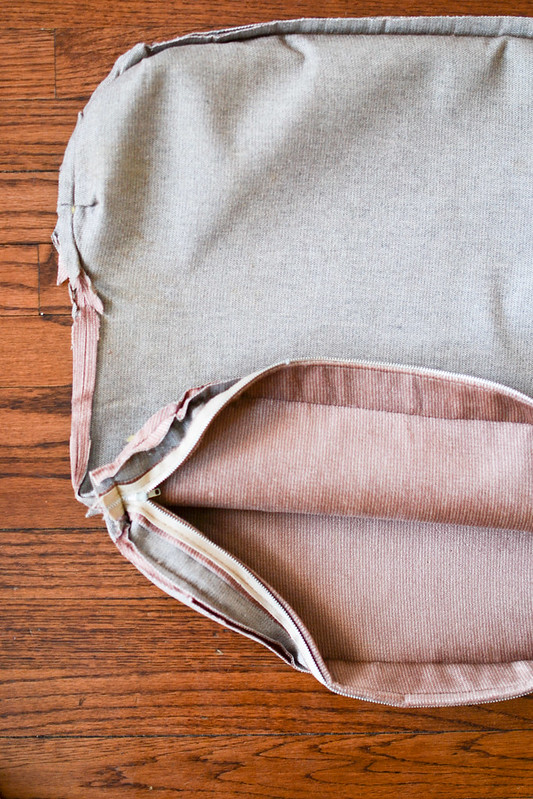
Step 2: Bottom Cushion
The bottom cushion was actually a little more of a challenge, because this was the first time I worked with a zipper. I took apart all the original fabric, ironed it, and cut it out just like the other piece. When working on a piece like this, make sure you diagram how all the pieces fit together, as once it is apart it can be a little tricky to remember all the nuances.
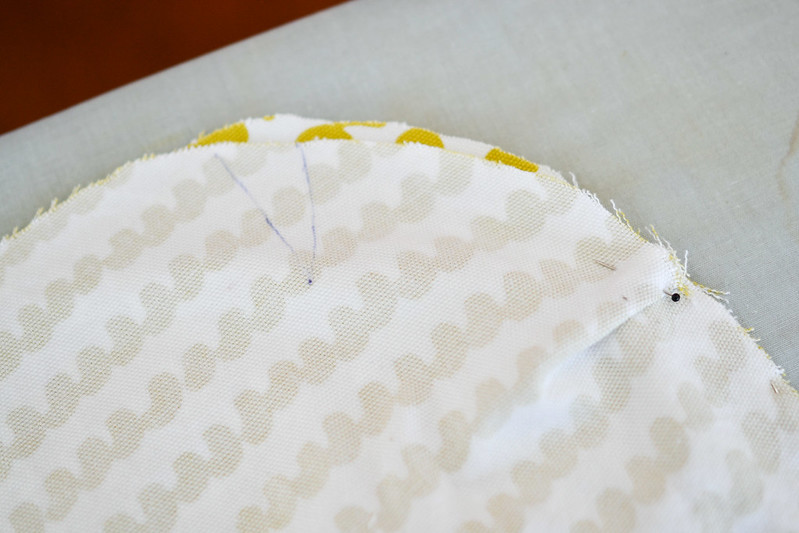
Since this piece had a couple small pleats in it, I drew them on my new fabric while the old one was still attached. This way, when I pinned the two pieces together, I could account for the pleats.
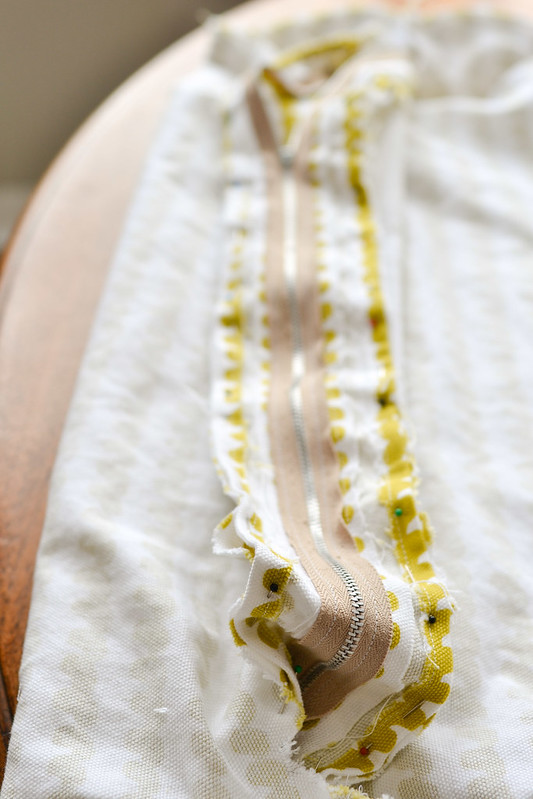
The main bottom cushion piece got sewn together on the machine. Then, I moved onto the zipper. I cut out the pieces, hemmed them, and then pinned in the zipper. Before sewing it in, I switched out the regular foot on my sewing machine to the zipper foot which allows you to sew close to the metal teeth without damaging your machine.
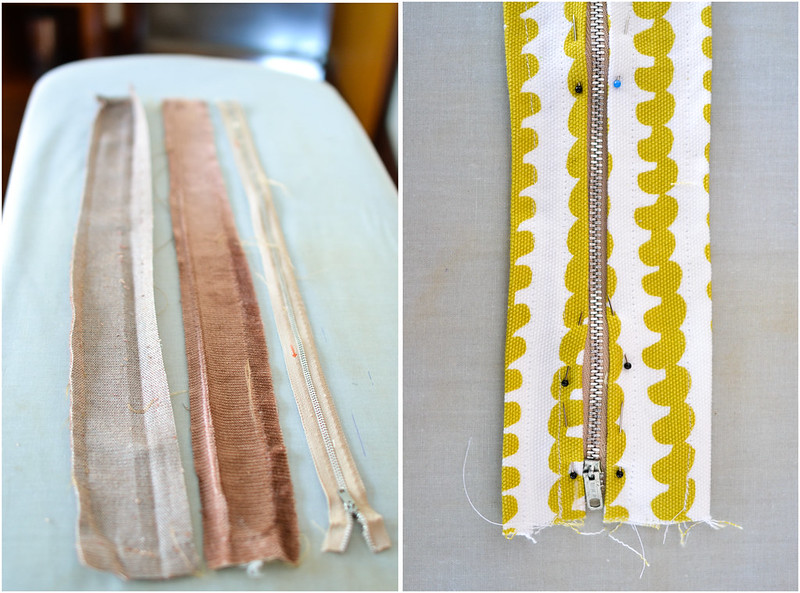
With the two large pieces constructed and the zipper piece sewn, I was ready to bring them together. Pinning the zipper inside out to the large piece was a little bit tricky, but with some measurement and patience it got done.
One important tip: keep your zipper open at least an inch so you can turn the cover right-side out once you’re done sewing. Otherwise, you’ll have to take out stitches to get at it.
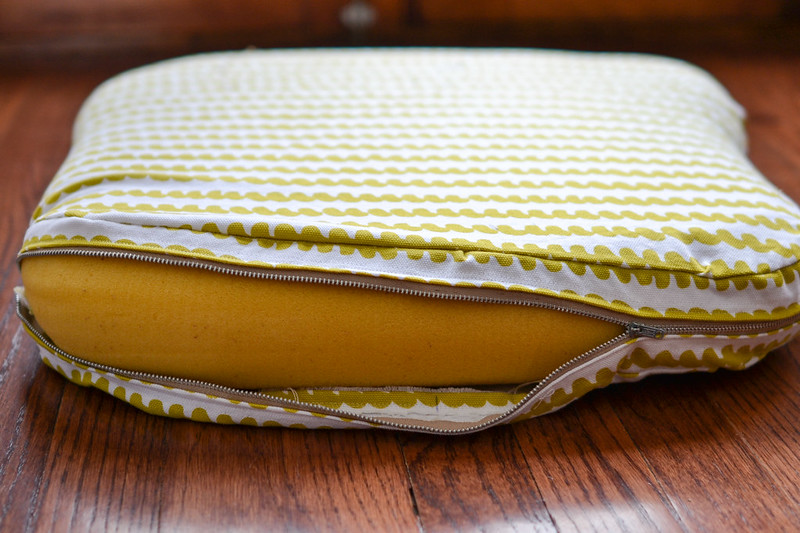
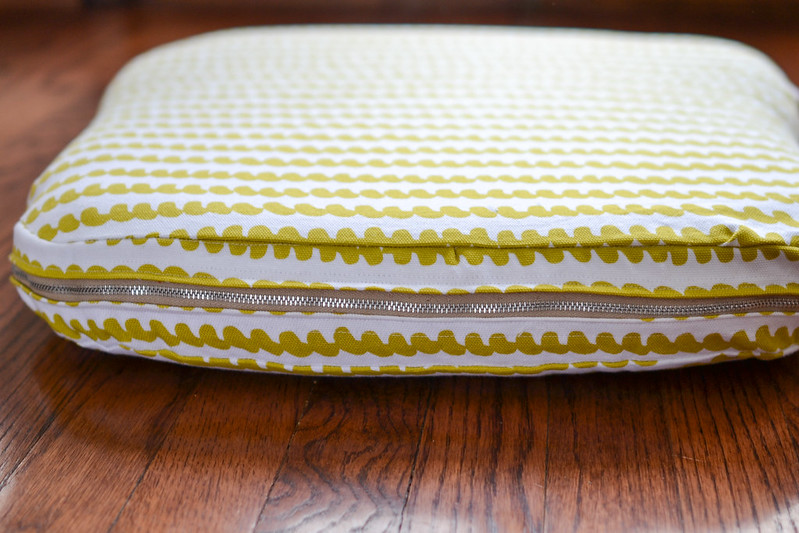
After attaching the zipper to the rest of the fabric, I flipped the cover right side out and stuffed the cushion back in. It was a nice, snug fit, which is exactly what I wanted.
Step 3: Bottom Bottom Cushion
Our chair had the unique feature of also having some padding actually stapled into the chair, which we considered scrapping but then just decided to go for it. We pretty much just reconstructed it and stapled a piece of fabric around the sides.
Hopefully you won’t have this step, although it took us all for 5 minutes. We’re a very effective staple gun team.
Step 4: Put It All Together
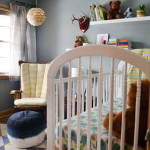
And here’s what it all looks like in the end:

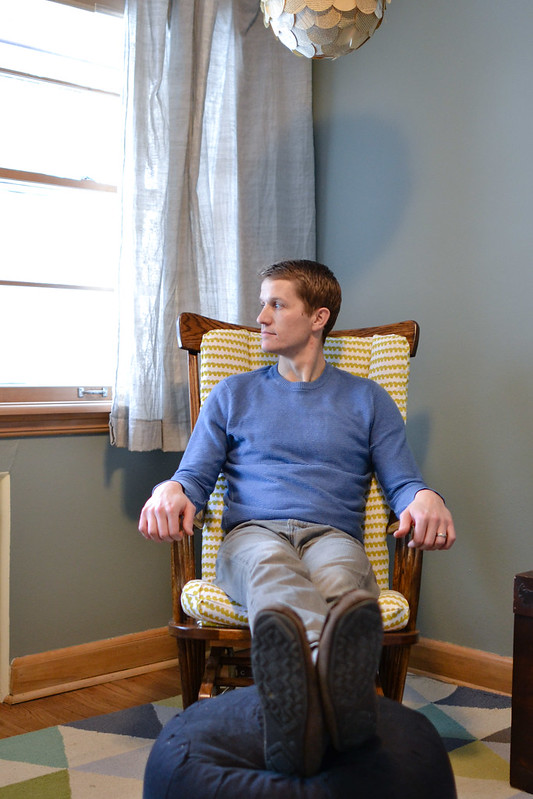
And with a soon-to-be-parent, for visual reference:
You may notice that there is some other progress in the nursery since you last saw it here. We’ve breezed through our project list, and I promise I will put up better photos of the whole room sometime soon:
Refinish glider in a dark stain to match dresser.Reupholster glider cushions.Buy/find/make a small side table for the glider.Sew curtains.Buy big rug.Buy changing table top for dresser.Get all the crib bedding and blankets.- Find adorable things to hang on the walls.
Change out the light fixture and perhaps buy a floor lamp.Reorganize all the closets upstairs (not shown because they are embarrassing).- Give birth and gauge child’s satisfaction with his new world.


[…] The curtains and the upholstery on the glider were both DIY projects. Check out what the glider looked before we got our hands on it. […]
writes The Finished NurseryAmazing Job! I see more and more moms going to Pinterest or other mommy blogs and DIY a nursery glider. Quite the steal for $75 as most gliders and rockers are now $200+. I wish I had the DIY skills to pull this off! Thanks for sharing.
writes BetsyWonderful job. Especially when you got the glider at such a bargain for $75. I do not have the courage to attempt things like this. Thanks for showing the steps.
writes OmarNice upholstery work and thanks for sharing the reupholstery process with us Vicky. You made it look like a first hand stork craft glider! Love the fabric you got from The Sewcial Lounge.
writes Mary Olsen[…] a yard, and I’m not about that life. I’m probably going to mostly follow along with this tutorial, even though our gliders are slightly […]
writes Re-evaluations. – Searching for MyselfIt looks beautiful! About how much fabric did you buy for the project? I have a similar sized chair I’d love to do this to!
writes MarlaMarlaHello, I had a question. I was wondering about how much fabric did you need for the project? I will need a bit more that as my chair has arm cushions with pockets but I am trying to get an idea of how much fabric i will need for my chair. Thank you for this wonderful turtorial!!!
writes Crystal LeCainI was wondering the same thing how much fabric did you buy I was thinking 5 to 6 yards?
writes ChristyHow many yards of upholstery fabric do you need?
writes patsquared2Looks so good! I’m going back to a thrift store tomorrow to get the $20 steal that I saw there, now that you’ve given me the confidence that I CAN handle the reupholstery it wants. :-)
writes Meadow