
I’ve put together a collection of resources – from kitchen tools to blogging services – that I use on a regular basis.
This list will continue to evolve as I find new and more interesting products that I love.
Please note that several of the links below are affiliate links, meaning that I earn a commission if you purchase them through those links. This blog is one of my favorite hobbies, but buying ingredients to continuously push out content can get a bit pricey. We eat absolutely everything that we make, unless its inedible, in which case it goes in the trash and is never spoken of again. I promise that I only list products that I use and love, and I appreciate your support.
Kitchen Tools and Gadgets
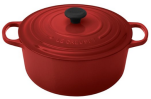
Le Creuset 7-1/4-Quart Dutch Oven – Without a doubt, the most used kitchen tool in our house. I use this at least twice a week for soups, for stews, for slow cooking, or even for baking bread.
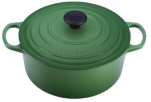
Le Creuset 4-1/2-Quart Dutch Oven – Same as above, but smaller. This one gets used for all the same reasons but when I’m making smaller batches. Dinner for 2? The 4 1/2 quart size is perfect. Having guests over? You’ll want to opt for the dutch oven above.
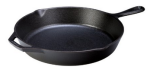
Lodge Cast Iron Skillet, 12-Inch – This is the second most used kitchen item, which we lovingly call Casty Cassidy. I use this to sear meats and cook all sorts of vegetables. It’s great because it can be thrown in the oven for recipes that require both stovetop and oven time.
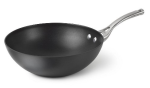
Calphalon Wok – Woks are obviously great for making stir fries, but I also use them when the volume of whatever I’m cooking is too great to fit in a normal pan. Usually, this involves wilting 100 cups of spinach or swiss chard.
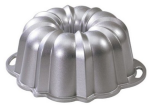
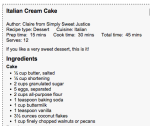
Nordic Ware Bundt Pan – Pretty much any cake can be made fancier when cooked in a bundt cake pan. This is my personal favorite one.
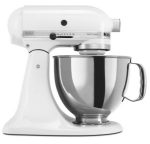
KitchenAid Stand Mixer – If you bake, this is a must. I use the stand mixer to make doughs, scones, cake batters, ice cream (attachment needed) and much more. Sure, you can do all this by hand, but that’s a little bit more effort than I’m wiling to put in these days.

KitchenAid Ice Cream Maker Attachment – There is something about homemade ice cream that is so satisfying. This attachment fits into the KitchenAid Stand Mixer listed above, so you don’t need a completely separate gadget.
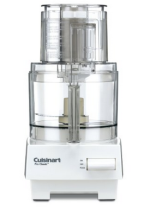
Cuisinart 7-Cup Food Processor – Pretty much an all purpose tool in my mind. I use it to chop, shred, puree, mix, and blend a variety of different ingredients. I like the big 7 cup version, but certainly you can opt for something smaller. I believe I’ve had my food processor since college.
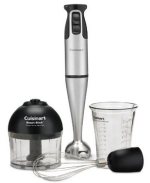
Cuisinart Immersion Blender with Attachments – If you asked me five years ago why anyone would need an immersion blender, I wouldn’t have been able to answer the question. I used to use my food processor for any blending or pureeing that was needed. But quite honestly, having an immersion blender makes the process of cooking smooth and creamy soups so much easier. Plus, this one comes with a mini food processor attachment, which is perfect for when you need to grind up a small handful of nuts or make a pesto.
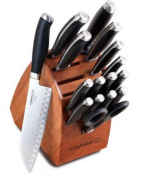
Calphalon Knife Set – It’s absolutely worth investing in a high quality knife set. It makes prep work and cooking that much faster and safer, and while they may be expensive, they also last forever.
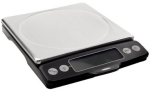
OXO Food Scale – This food scale is small, compact, and very accurate. It comes in handy when I need to make sure my measurements are dead on. Especially if you’re a baker, you’ll want a good kitchen scale.
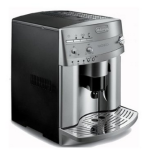
DeLonghi Espresso/Coffee Machine – This isn’t so much a cooking tool as it is a necessity if you like good espresso. We recently upgraded to this model after retiring our first espresso machine (who we lovingly referred to as our first child).
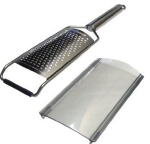
Microplane Grater – Let’s move on to some of the little stuff. A good grater will go a long way in the kitchen.
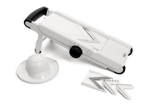
OXO Good Grips Mandoline Slicer – Perfect for getting thin slices of potatoes, zucchini, or other vegetables. This one also comes with a julienne attachment, meaning you can get thin strips of veggies with almost no effort. Just don’t chop your fingers off.
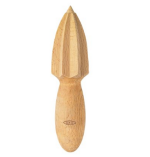
OXO Wooden Reamer – I don’t own a fancy juicing machine, and this simple wooden tool does the job well when it comes to juicing lemons, limes, and oranges.
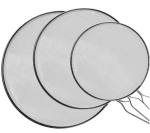
Home Basics Splatter Screen Set – So necessary when you’re frying up meats and you don’t want to make a mess. I place these over my frying pans and save myself the hassle of scrubbing grease off the remainder of the kitchen.
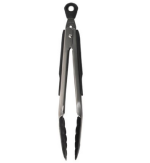
OXO Tongs with Nylon Heads – Another simple addition to the kitchen that makes a big difference. Tongs are wonderful.
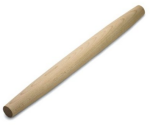
French Rolling Pin – I love my all-wood French rolling pin because it allows me to distribute even pressure when rolling out doughs for pies and tarts. I find it works much better than the traditional plastic rolling pins with handles.

Taylor Candy and Deep Fry Thermometer – I’ve never made candy before, but I use this candy thermometer quite a bit, specifically when testing the temperature of water for baking or the temperature of oil when deep frying. This particular model also has a clip that slides up and down, meaning you can attach it to a pot without it touching the bottom for a more accurate read.
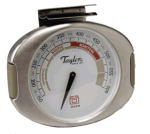
Taylor Oven Thermometer – Unless it’s brand new, your oven is likely not calibrated perfectly, meaning that when it says it’s 350 degrees, it may be hotter or colder. When I first started using the oven thermometer, I was shocked to find out just how off our oven was. This simple tool has greatly improved any baking or roasting I’m doing in our oven.
Cookbooks
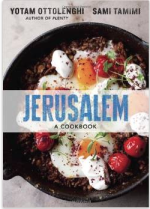
Jerusalem: A Cookbook – Here goes a couple Yotam Ottolenghi cookbooks that are a must have. Start with this one.

Ottolenghi: The Cookbook – His self titled cookbook, also a must.
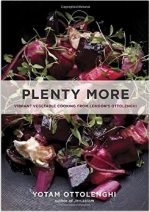
Plenty More: Vibrant Vegetable Cooking – I could keep going with Ottolenghi, but I’ll mark this as my final recommendation of his. But in all honesty, anything this man has touched is gold, so feel free to get the others too.
Vegetable Literacy – One of my go to cookbooks for vegetarian recipes. Organized by vegetable, it makes it really easy to make use of what’s in your fridge without needing to do too much research.
The Flavor Bible – Not exactly a cookbook but instead a resource for cooks who want to invent their own recipes but want a little support in what flavors go well together.
The Bread Bible – My other bible. This one contains over 300 bread recipes, starting from simple no knead recipes and working it’s way to the most complex versions. It’s the type of cook you want to bake your way through as you learn and improve your bread making skills.
The Smitten Kitchen Cookbook – If you follow The Smitten Kitchen blog, you know that the recipes found here are fun, exciting, and always delicious.
Huckleberry: Stories, Secrets, and Recipes From Our Kitchen – Another baking cookbook that you must have. It covers the sweets and the savory dishes that everyone loves to bake.
Photography Resources
Nikon D3100 Camera Body – This is a great dSLR camera body that I’ve been using since March 2013. If you want to upgrade from a point and shoot to a starter dSLR, I highly recommend this one.
Nikon D750 Camera Body – I upgraded to this body in December 2017 and have definitely seen an improvement in my photography. The previous body I was using (above) was great as a starter, but this paired with the Nikon 28mm f/1.8G Lens really opened up more options for me in my photography.
Nikon 18-55mm f/3.5-5.6G Lens – This lens attaches to the Nikon D3100 and is the lens I started with. Again, it’s a great starter lens for food photography. Use this lens to learn to shoot in manual mode. It produces high quality photos and is very reasonably priced.
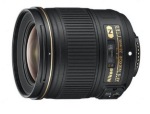
Nikon 28mm f/1.8G Lens – In December 2014, I upgraded to this lens. It has a much wider aperture meaning I can get more depth of field in my photos as well as photograph in lower light situations. Considering I’m often cooking in the evenings, this is critical for me.
Lowel Ego Digital Imaging Fluorescent Light – This light has been a savior. Since I mainly photograph in the evenings, I don’t get a ton of natural light. I use this light (which comes with a reflector) to get a nice, clean image. You can read more about my set up here.
Adobe Lightroom 5 – This is the software I use to organize and edit my photographs. When I first started out, I was using iPhoto, but quickly grew out of that. They also teach you how to use backdrops for good pictures. Lightroom gives you lots of control over how to edit your photos and is pretty easy to learn. The other popular program to use is Photoshop, which has more features but is also more expensive. If you’re just starting out with photo editing, I recommend learning Lightroom first.
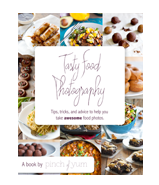
Tasty Food Photography e-Book – There are lots of great resources out there created by food bloggers, and Pinch of Yum‘s e-book is one of them. If you want tips and tricks on food photography compositing, styling, and more, this is a great tool.
Blogging Resources

BlueHost – Bluehost is the company I use to host my blog. While there are lots of hosting companies out there, Bluehost makes setting up a WordPress site very simple. Their prices are low, their service is great, and they offer a free domain name registration when you sign up.
Easy Recipe Plugin – I use this plugin to format my recipes so they aren’t in the main body of text. The interface is very easy to use and they have a free version with lots of great features. You can upgrade to the paid version to unlock things like nutritional information, etc.
Pinterest Pin It Pro Plugin – You want to make it as easy as possible for your tasty photographs to make it to Pinterest. Food bloggers often find that Pinterest is one of the leading sources of traffic for their sites. This plug in makes the integration between your site and Pinterest seamless.
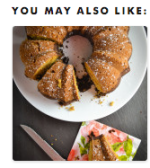
WordPress Related Posts Plugin – Another way to increase engagement on your site is to point your readers to similar posts. I recommend using this plugin to suggest what else your readers may like. It keeps them browsing your site for more delicious recipes!


