


And now, a post from Jason:
One of the best parts of doing home improvement activities in an old house is that you get to accumulate both the interesting tools you need to do said projects (like shower valve socket wrenches), and a mini lumber cache of all of the leftovers.
The best leftover we’ve ever had was a 25″x28.5″ piece of butcher’s block counter top left over from our basement improvements. We needed to purchase a 12′ long piece and then shorten it, so we had a good piece of a very pretty counter to work with.
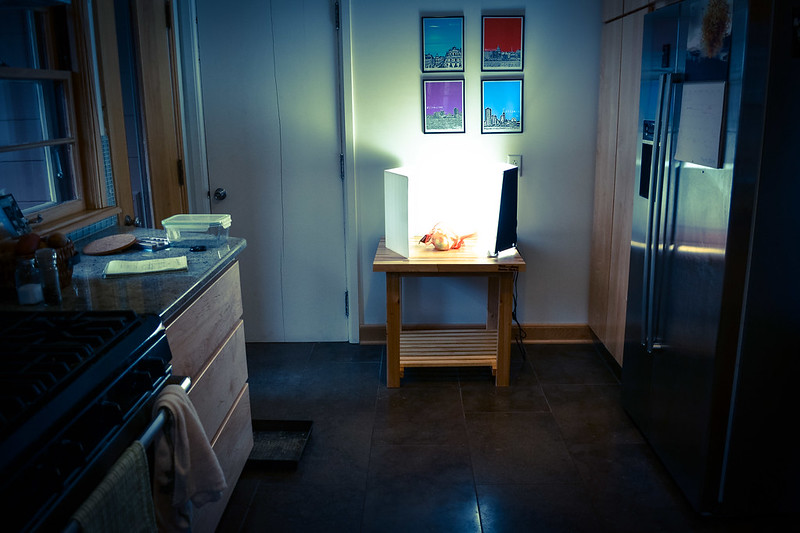
Little did I know Vicky had ideas for it even before I realized we would have a good enough chunk to work with, and that vision was for a mini-studio in our kitchen. Since you’re here reading this, you already know that Vicky’s hobby is keeping an explicitly well documented (visually and written) record of recipes she makes successfully (yes that’s right—some don’t make the cut, but I still find very delicious). I would like to point out that this blog also contains some things that I made, but I am very much a minority contributor and I guess that’s what happens when you get married.

When taking pictures for this blog Vicky often times would have to put the plates of food on a chair or other lower-than-table-height situation so she could get above the food to take the types of pictures she likes/look the best. This is not ideal for many reasons. Plus she looked ridiculous doing it.
So, this great piece of left over countertop was about to become a mini kitchen studio. I was eager to try to make that happen since Vicky just got me a DeWalt table saw for my birthday. A table saw is like the oven of woodwork, any decent project is going to require one so I am stupid excited to finally have a nice one.

The first step was, quite obviously, to figure out dimensions based on the needs we had for the table. This meant some online searching but to be honest I didn’t find anything super-helpful, just a lot of OK examples for how people built floating islands which helped influence my design. The final design was to mesh the height Vicky wanted with a storage space underneath.
To create the design I relied on good ole fashioned paper and pencil, you’ll see the images below as Vicky was so kind as to take pictures of the paper, on the table, to help illustrate. The design is basically four legs that are framed up top as well as about 3″ from the floor to provide a shelf for storage.
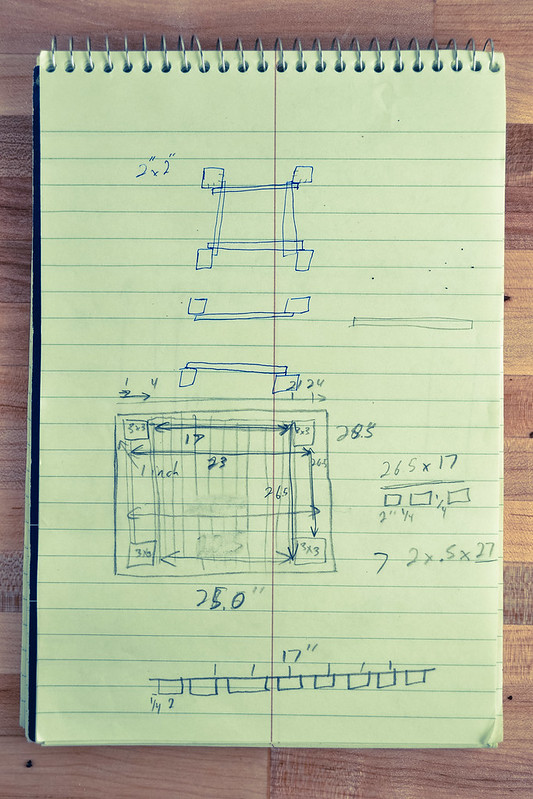

Before calling me an idiot for my bad diagrams, remember that a lot goes on in my head, and I hate re-documenting it just for the sake of it.
First, I figured out how far from the edges I wanted the legs to connect, and settled on about 2″ from both sides, in the four corners. I measured to have four supporting lengths connect the top, and then the bottom,with about 12 slats put across the two sets on the bottom to make the shelf. Then I did fun math to figure out total lengths.
It has been a long time since I’ve actually needed to buy lumber firsthand vs. just use left overs. Key lesson learned is that ACTUAL lumber measures are all NOT exact so a 2×4 is actually like a 1.75×3 or so. That meant I had to redo my exact measures after buying the lumber. In the end I settled on 1×2 for the framing, and 2×3 for the legs to keep the proportions with the thickness of the table top and size of the table.
For hardware I ended up using 2 inch wood screws, and doing a pocket screw setup for all major connections. Now, this was way more difficult than it needed to be, but it was fun to learn that lesson. Additional lesson: buy a jig if you can, there are awesome ones out there that will help with the holes you need to pre-drill for the screws. I figured out a free-hand method that sometimes resulted in messy holes. I used light colored wood putty to fill the holes that are visible, but the beauty of the pocket screw is that if you are crafty, most of the holes are out of line of sight and you have a strong connection.
Finally, here are the assembly steps I used:
- Lay out the lumber you purchased and your table top. Do so in a way to prevent scratching if you are in a workroom or, in my case, your garage.
- Measure out and cut your four legs, keeping in mind the kerf, or amount of wood that the saw blade itself will take from the wood.
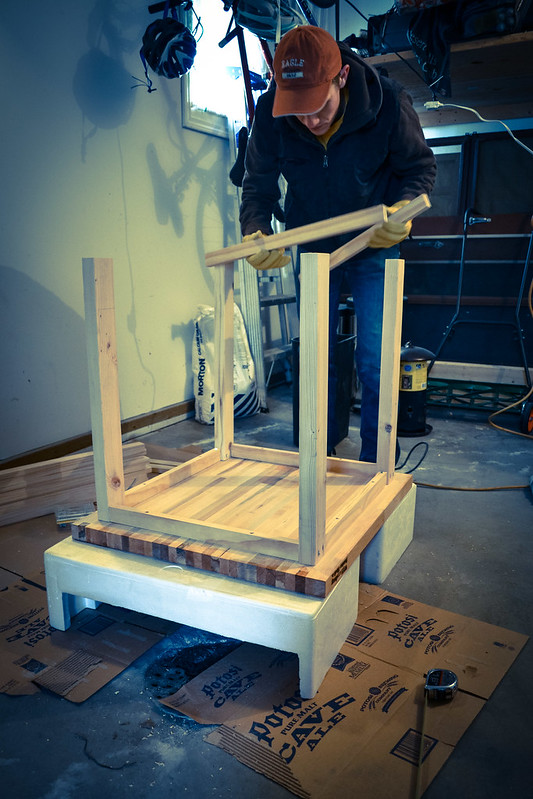
- Stand up your legs (your cut should be a perfect 90 degree angle so you can make precise measures for your supporting pieces. This ended up helping me save some inches of lumber/a few recuts.
- Cut your supporting pieces, 8 in total in my plan.
- Drill the holes necessary to screw the legs to the top of the table. Keep in mind the depth of your table top, and the angle of the hole so you don’t pop through the top but still allow your screw enough to bite into when it’s through the leg. I found a steep angle at about 35 degrees from the wood to your drill bit downward works best.
- Fit your top side frame in as shown in the photo. I put them between the legs, but you could also put them on the outside or inside which might make attaching a bit easier. I liked the look of how I did it so I drilled two holes with countersink space to hide my screw tops to harness each piece directly to the top of the table, ensuring my piece of wood made good contact to bracket my legs. Then, I drilled two pocket screw holes to attach each to the two legs it supported, again using a bigger 1/2 inch bit to hid the screw tops.
- Repeat for the remaining 3 pieces.

- Now for the bottom frame, I found that it would be easier to attach the final slats to create the bottom shelf if I used two pieces of wood to attach two legs on each side together, rather than one across between each pair of legs on four sides as I did with the top. It was an aesthetic and strength choice. To measure, make sure that you have each leg at 90 degrees from the top of the table as they may be off based on how you did with the top, and you get the opportunity to use your bottom frame to correct the straightness issues. I found using an L square with a level did this well so I got the measurements I needed.
- Cut your four pieces to length.
- Use the longer piece that is easier to position and drill first, ensuring that you have a proper angle to your leg so your legs will be straight when finished. Drill and screw both ends to the legs, ensuring that your end result is level/legs are straight from the top of the table.
- Repeat for your remaining 3 horizontal pieces.
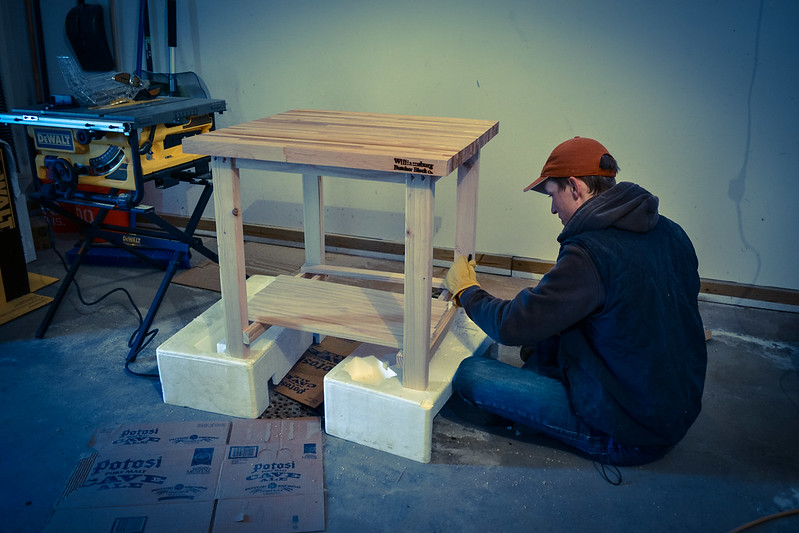
- Cut all remaining pieces that will make up your bottom shelf the same length. Depending on how close you would like the slats to be, you can adjust as you work to make the most of the space you have while still conserving the wood.
- Nail these pieces to the outermost support going between the legs. Yes, I know we used screws for everything else, but this is a lot of holes and you don’t need that redundancy with this number of supports. I used finishing nails that I then countersunk.
- Time for finishing! I decided to use a simple Tung Oil finish. For Tung Oil you put on one generous coat, then 15 minutes later buff out the excess, waiting 24 hours between subsequent coats. Two is recommended, and any more increase the shine considerably. I did two.
- To finish it off, I used a light colored wood putty to cover in the countersunk screws and nails which worked pretty well.
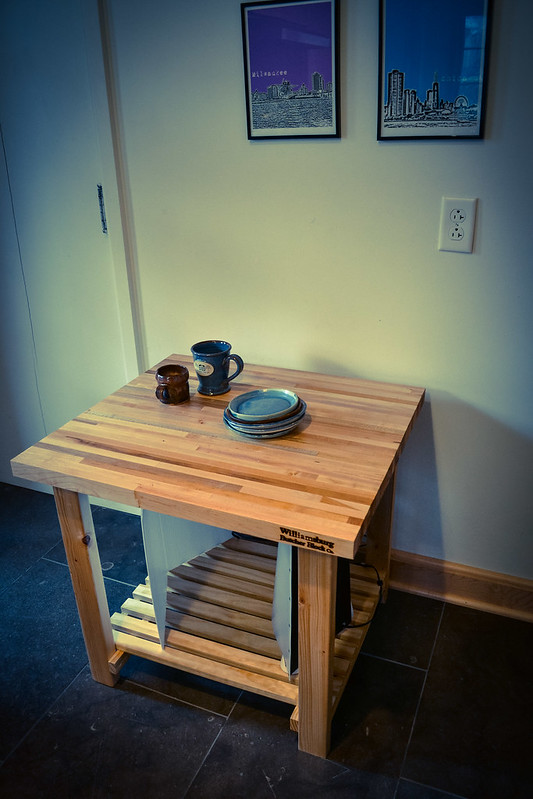
I am very happy with the finished product, and the only final thing you might need to worry about is any fine tuning with the length of the legs to prevent the wobbly table syndrome. You can also easily use felt stickers to even it out at that point, as well as sanding.


Beautiful!! Very nice job Jason.
writes Mary[…] Mini Picture Island – This project changed how this blog looks pretty significantly. It’s my staging area […]
writes Two Year Blog Anniversary and My Best Of Choices - Things I Made Today[…] bright, airy kitchen in the middle of the day, when the sunshine was pouring in, rather than on my usual setup at […]
writes Golden Beet, Halloumi, and Walnut Salad - Things I Made Today3arising
writes 3homesickness